Demystifying Your Network’s Backbone: A Guide to Structured Cabling Equipment
In the world of IT, we often focus on the flashy tech—blazing-fast Wi-Fi 6 routers, powerful servers, and sleek switches. But what if we told you that the true hero of any reliable, high-performance network is something far more humble? It’s the unsung hero working behind the walls and above the ceilings: the structured cabling system.
Think of it as the central nervous system of your building’s IT infrastructure. Without a healthy, well-designed nervous system, the brain (your servers) can’t communicate effectively with the rest of the body (your computers, phones, and devices).
So, what exactly goes into building this critical foundation? Let’s break down the essential structured cabling equipment you need to know.
What is Structured Cabling?
In a nutshell, structured cabling is a standardized approach to cabling infrastructure. Instead of a messy, ad-hoc spiderweb of cables for phones, computers, and printers, it uses a unified system of cabling and hardware. This makes the network easier to manage, scalable for growth, and far more reliable.
The entire system is governed by standards (like TIA/EIA-568) that ensure consistency and performance.
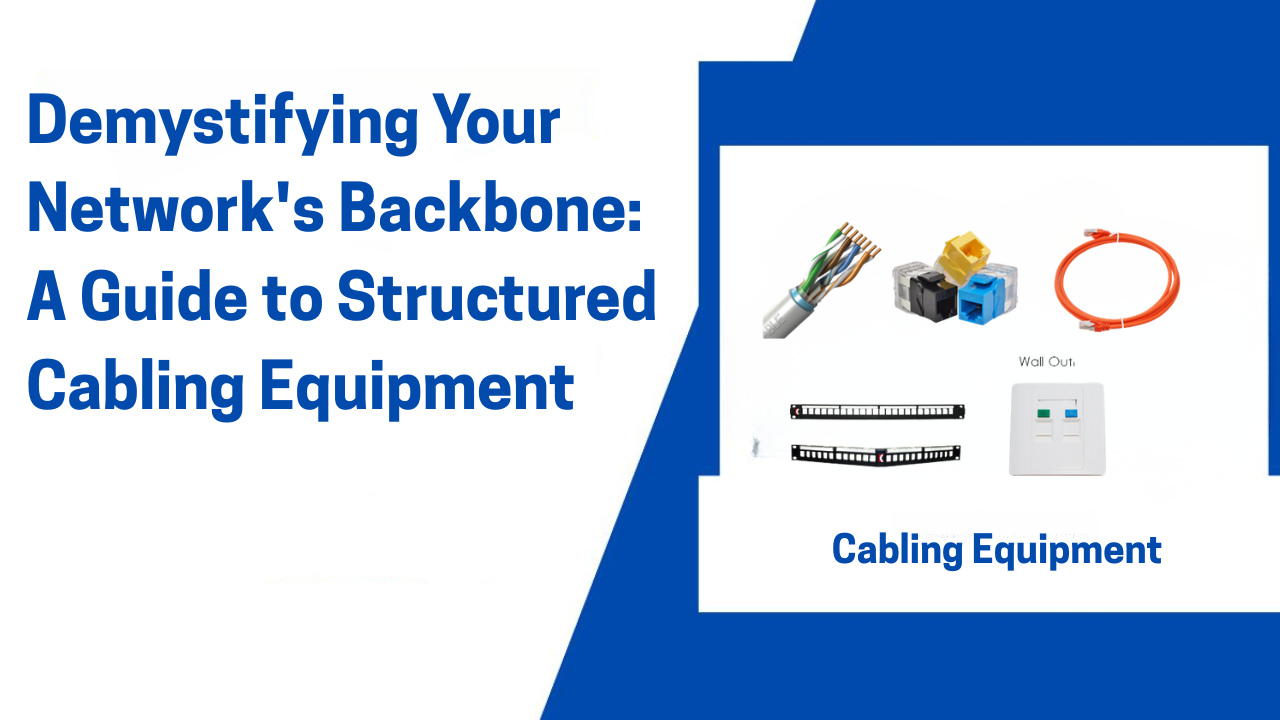
The Essential Equipment Checklist
A robust structured cabling system is built from several key components, each playing a vital role.
1. The Cable: The Information Superhighway
This is the physical medium that carries your data. The choice of cable is fundamental to your network’s speed and capabilities.
-
Category 6 (Cat 6): The current workhorse for most offices. It supports Gigabit Ethernet (1 Gbps) and, at shorter distances, 10-Gigabit Ethernet (10 Gbps). A great balance of performance and cost.
-
Category 6A (Augmented): The upgrade for future-proofing. It’s designed to reliably support 10 Gbps speeds over the full 100-meter channel. Essential for data centers and high-bandwidth environments.
-
Shielded (F/UTP) vs. Unshielded (U/UTP): In environments with a lot of electromagnetic interference (EMI)—like near heavy machinery or medical equipment—shielded cable is crucial to protect signal integrity. For most standard offices, unshielded is sufficient.
2. Patch Panels: The Central Nervous System’s Switchboard
If the cables are the nerves, the patch panel is the spinal cord. It’s a mounted hardware unit containing ports that terminate all the horizontal cables running from work areas (desks, offices) to the wiring closet.
-
Why it’s crucial: It provides a permanent, organized, and labeled endpoint for all your cables. Instead of running a single long cable from a switch to a desk, you run one cable from the panel to the switch and a separate, permanent one from the panel to the wall outlet. This makes moves, adds, and changes (MACs) a breeze.
3. Jacks and Wall Plates: The User’s Access Point
This is the part of the system you actually see. A jack (typically an RJ-45) is mounted inside a wall plate at each workstation. It’s the final endpoint for the horizontal cable, providing a neat and professional port for users to plug their devices into.
4. Patch Cables: The Flexible Connectors
These are the short, flexible cables (usually 1-10 feet) that connect devices to wall jacks and, crucially, connect patch panels to network switches in the closet. Don’t skimp on these! A poor-quality patch cable can be the weak link that cripples an otherwise perfect installation.
5. Network Racks and Enclosures: The Command Center
This is the “home” for all your central equipment. Racks (open or closed) and enclosures (wall-mounted cabinets) provide a secure, organized, and ventilated space for your patch panels, switches, and servers.
-
Rack Units (U): Equipment size is measured in “Us.” A standard rack might be 42U tall. Knowing this helps you plan how much gear you can fit.
6. Cable Management: The Key to Sanity
A tidy cabling closet is an efficient one. Cable management accessories are non-negotiable:
-
Horizontal and Vertical Managers: These are plastic or metal bars with fingers that guide patch cables neatly from the patch panel to the switch, preventing tangles and strain on the connectors.
-
D-Rings and Loops: Used for managing the bulkier permanent cables behind the patch panels.
7. The Punch-Down Tool: The Installer’s Best Friend
This is the specialized tool used by technicians to “punch down” and terminate the individual copper wires from a cable onto a patch panel or jack. It ensures a secure, gas-tight connection that is essential for a stable signal.
Why Investing in Quality Equipment Matters
Cutting corners on your cabling infrastructure is a classic case of being “penny wise and pound foolish.” Here’s why quality matters:
-
Performance & Reliability: Inferior cables or poorly terminated jacks cause packet loss, slow speeds, and mysterious network dropouts that are incredibly difficult to diagnose.
-
Scalability: A well-planned system can grow with your business. Adding a new team or upgrading to faster switches is simple when the foundation is solid.
-
Reduced Downtime: A professional installation with proper labeling and management drastically reduces the time needed to troubleshoot and resolve issues.
-
Long-Term Cost Savings: While the initial investment might be higher, a quality structured cabling system has a lifespan of 10+ years, saving you from costly re-cabling projects down the line.
Planning Your Installation: A Final Tip
Before you run a single cable, create a detailed plan. Document everything: label every cable at both ends, every port on the patch panel, and every wall jack. This documentation will be worth its weight in gold for your IT team.
Conclusion
Your network is only as strong as its weakest link. By understanding and investing in high-quality structured cabling equipment—from the right category of cable to the humble patch panel—you are not just installing wires. You are building a resilient, high-performance, and future-proof infrastructure that will power your business for years to come.
Ready to build a stronger network? Start from the inside out